Icons8 Face Swapper: Crafting Images with Precision and Ease
In today’s fast-paced digital world, the demand for realistic and seamless image composites is higher than ever. Whether you’re a designer, marketer, photographer, or developer, the ability to swap faces convincingly in photos can save time, reduce costs, and unlock creative possibilities.
Icons8 Face Swapper is a powerful tool designed to meet this need — delivering high-quality, believable face swaps with a workflow that’s both disciplined and accessible.
This guide dives deep into how Icons8 Face Swapper works, the best practices for using it in production, and how different roles can leverage it to enhance their projects.
We’ll explore the technical pillars that make the tool reliable, the operational workflow to ensure consistent results, and the governance considerations that keep your work ethical and compliant.
Whether you’re new to face swapping or looking to refine your process, this handbook offers a comprehensive roadmap to success.

What Exactly Does Icons8 Face Swapper Do?
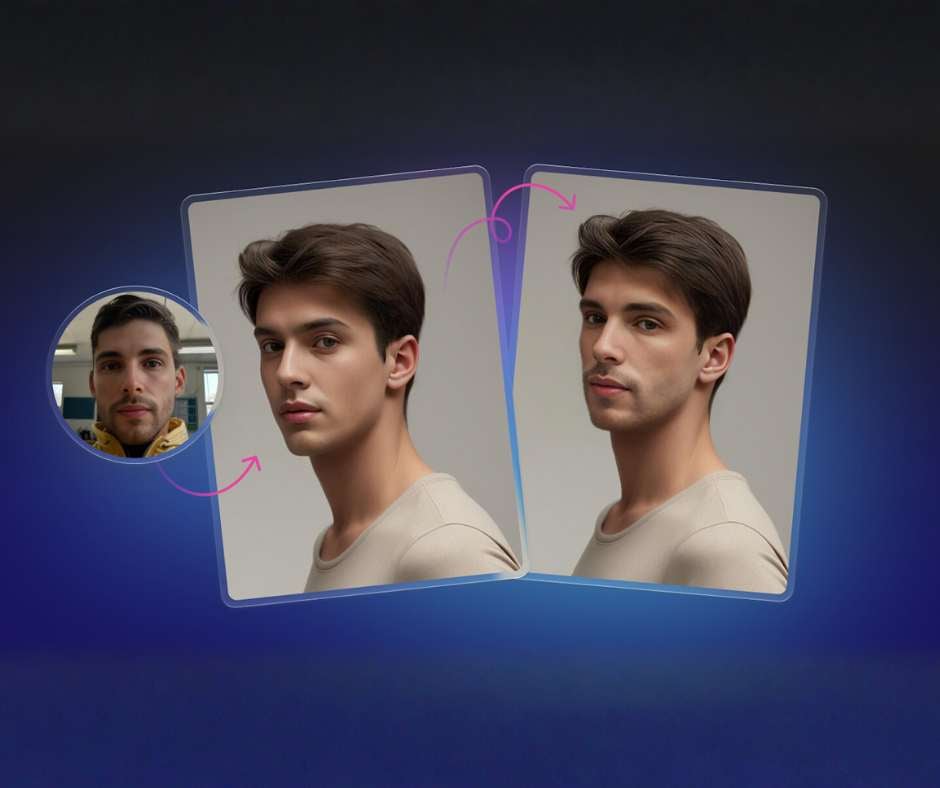
At its core, Icons8 Face Swapper replaces the face visible in a base photograph with a different face sourced from another image. But it’s far more than a simple cut-and-paste.
The system intelligently aligns facial geometry, matches lighting conditions, and blends edges so the final composite looks like a single, authentic photograph.
Importantly, the background and wardrobe stay untouched, preserving the original scene’s context. When inputs are carefully chosen and compatible, the results can withstand the scrutiny of 100% zoom inspection and even hold up in large-format print like posters.
The Four Pillars of a Perfect Face Swap
Icons8 Face Swapper’s success hinges on four key technical pillars that work together to create a seamless composite:
1. Precision Landmark Detection and Pose Normalization
The system detects critical facial landmarks — including eye centers, nose bridge, mouth corners, and jawline contours.
It then normalizes the pose by adjusting yaw (side-to-side rotation), pitch (up-and-down tilt), and roll (head tilt) to bring the reference face and base face into perfect alignment. This geometric harmony is the foundation for a believable swap.
2. Photometry: Matching Light and Shadow
Faces are three-dimensional and lit by complex lighting environments. The tool locally matches exposure, color temperature, and tint so shadows under the nose and lower lip maintain their natural softness and shape.
This photometric adaptation ensures the swapped face respects the scene’s lighting, avoiding the telltale signs of manipulation.
3. Edges: Seamless Blending with Hair and Accessories
Edges are tricky — hairlines, beards, and eyeglass rims often reveal composites if handled poorly.
Icons8 Face Swapper uses edge-aware blending to preserve micro-shadows and stray hairs, preventing unnatural halos or matte-cutout artifacts.
This attention to detail keeps the composite visually consistent even under close inspection.
4. Texture: Preserving Skin Grain and Natural Detail
The final composite respects the base image’s grain pattern and texture. Unlike many face-swapping tools that smooth skin excessively, Icons8 Face Swapper rejects plastic smoothing that would expose manipulation.
The skin grain follows the noise pattern of the original photo, maintaining authenticity.
Input Discipline: The Key to Avoiding Rework
Even the best tools require good inputs. Following these guidelines helps prevent rework and ensures the highest quality results:
- Stay in sRGB color space until layout. Convert to CMYK only at the final print stage to preserve color fidelity.
- Use JPEG or PNG files with modest compression. Heavy compression introduces macro blocks that reduce landmark detection accuracy and create false edges.
- Choose neutral expressions on the reference face. Open mouths or big smiles require nearly identical poses on both images to avoid mismatches.
- Maintain accessory parity. Thick acetate glasses won’t blend well with thin wire rims, and clean-shaven faces won’t match dense beards.
- Correct strong color casts on the base image before swapping. Mild white-balance adjustments help the composite blend naturally.
Operating Workflow for Consistent Quality
To integrate Icons8 Face Swapper into your production pipeline, follow this workflow:
- Intake Check: Verify resolution, color space, pose compatibility, expression, and accessory parity. Reject inputs that don’t meet basic criteria.
- Run the Swap: The system performs detection, pose normalization, photometric adaptation, and edge-aware blending automatically.
- Inspect at 100% Zoom: Confirm gaze alignment, eyelid fit, nostril asymmetry, jaw continuity, and hair edges around temples and sideburns.
- Note Micro-Fixes: Plan small local tweaks such as subtle jaw desaturation to remove color spill in high-contrast scenes.
- Export: Preserve original pixel dimensions to maintain layout constraints in design tools like Figma, Sketch, Photoshop, or Lunacy. Generate JPEG derivatives for web separately; store archival PNG or TIFF files if grading is expected.

Objective Quality Gates: What to Look For
To maintain professional standards, use these measurable criteria as your quality gates:
- Alignment: Pupil centers should align on the same horizontal scan line; nostril asymmetry must match the head tilt.
- Illumination: Shadows under the nose and lips retain their natural softness; cheek mid-tones respect the scene’s white balance.
- Edges: Hairlines and beards pass a 200-300% zoom test without halos or matte rims.
- Texture: Skin grain follows the base image’s noise pattern; any plastic smoothing is a fail.
Document these checks in a one-page QA sheet and attach it to every batch for accountability. For quick testing and quality assurance, try the tool yourself at ai face swap.
How Different Teams Can Use Face Swapper
Designers and Illustrators
Build consistent characters across campaigns without costly reshoots. Evaluate multiple references against your brand persona and lock one for the series to stabilize visuals. Use a clear naming scheme (e.g., proj_scene_ref_v01.jpg) to quickly restore prior variants.
Design Students
Maintain a compact lab log recording base and reference filenames, pose angles (e.g., ~20° yaw, slight down-tilt), and lighting notes (e.g., north window, overcast). This log simplifies critique and ensures reproducibility when briefs change.
Marketers and Content Managers
Adapt layouts for multiple regions by swapping faces to reflect audience demographics. Keep a release register tracking base files, reference identities, license status, publish dates, channels, and owners. Audits and rollbacks become straightforward.
Business Stakeholders
Prototype personas for proposals and pitch decks without booking expensive shoots. Clearly label composites in internal documents to prevent misinterpretation as authentic photos.
Photographers
Rescue strong shots where subjects blinked or looked away. For editorial use, approvals are essential; for commercial work, store originals alongside edits with model releases and usage terms to satisfy review policies.
App Developers
Integrate swapped portraits into workflows for background removal, smart cropping, avatar generation, and automated face checks. Implement preflight scripts to verify bounding-box size, inter-pupil distance, and resolution per breakpoint, failing weak inputs early.
General Users
Create playful edits with consent, avoiding implications of endorsement. Try and share on social media how would you look if you were too thin, young again or look-alike of any character.
Integration notes
- Figma / Sketch / Lunacy — replace layers and keep constraints; preserving original pixel size prevents auto‑layout shifts. Consider locking focal points after replacement.
- Photoshop — place as a linked Smart Object; a subtle local desaturation (5–10% flow) along the jaw removes residual color spill while keeping texture.
- Print — perform the swap in sRGB, then convert to CMYK at layout in InDesign or Affinity. Swap before heavy grading to avoid amplifying seams.
Governance and compliance
- Obtain consent for the base subject and the reference face; store proof with the asset.
- Confirm publicity rights and model releases, especially with public figures; local rules vary.
- Disclose composites in training and research contexts with a short caption; transparency preserves trust.
- Avoid implying endorsement where none exists; follow the ad rules of each platform.
Constraints and proven workarounds
- Tiny faces — crop tighter, swap, then composite back into the wide frame.
- Harsh casts — pre‑balance the base, then swap.
- Extreme pose — choose a reference with matching yaw and pitch; otherwise jaw seams appear.
- Thick glasses — match frame thickness/finish across inputs for believable edges.
- Dense beards — best when the base already shows some facial‑hair texture.
Team benchmark protocol
Assemble a compact benchmark set:
- Scenes — indoor tungsten, outdoor overcast, office fluorescent.
- Variants — with/without glasses; clean‑shaven and bearded.
- Gates — pixel tolerance for alignment, seam visibility at 200% zoom, ΔE threshold on mid‑cheek color.
- Process — two references per scene; keep the stronger output; archive inputs, references, outputs, and a one‑line QA note in a versioned folder. Re‑run quarterly to detect drift.
Troubleshooting quick answers
- Crossed eyes → pose mismatch; choose a closer reference.
- Jaw halo → background spill or color cast; desaturate the seam locally.
- Plastic skin → denoised base; add fine grain to restore micro‑texture.
- Wrong hairline → forehead height mismatch; pick a reference with similar hair geometry.
Why Icons8 Face Swapper Looks So Authentic
Viewers instinctively notice three errors first: misaligned gaze, inconsistent lighting direction, and missing micro-texture.
Icons8 Face Swapper counters these with precise alignment, localized photometric matching, and edge-aware blending that preserves hair and fabric details.
With compatible inputs, composites survive zoomed inspection and large-format print.
Final Thoughts
Icons8 Face Swapper is a dependable component when paired with disciplined intake and a concise QA checklist. It respects scene lighting, preserves texture, and exports at original size, ensuring downstream layouts remain stable.
With proper consent, license checks, and clear labeling, it supports professional and educational work across design, marketing, photography, prototyping, and product development.
By following the guidelines and workflows outlined here, teams can confidently integrate face swapping into their creative processes — saving time, reducing costs, and expanding creative possibilities without sacrificing quality or authenticity.
